

Create a delicate paper bloom that brightens any day – a thoughtful gift for someone special, or a little joy just for you.
You will need:
- Scissors
- Glue
- The paper shapes provided in this downloadable PDF.
Tulip flower
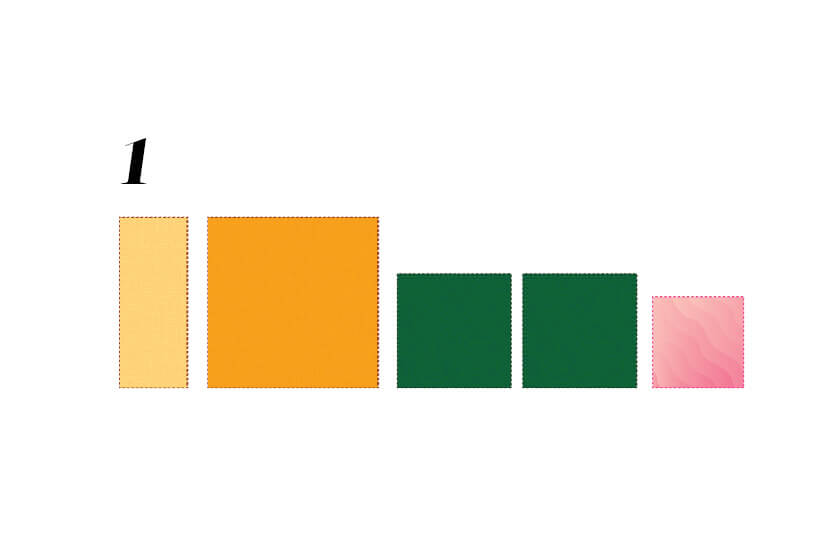
STEP 1: Cut out the shapes from the PDF provided.
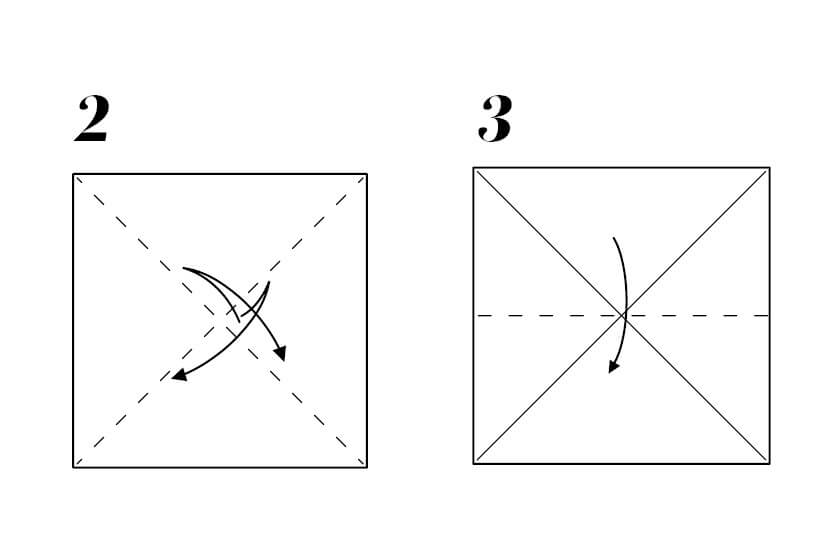
STEP 2: Begin with the pink square, wrong side facing up. Fold in half diagonally, crease well and unfold. Fold diagonally the opposite way, crease well and unfold.
STEP 3: Fold in half vertically, crease well and unfold. Fold in half horizontally, crease well and unfold.
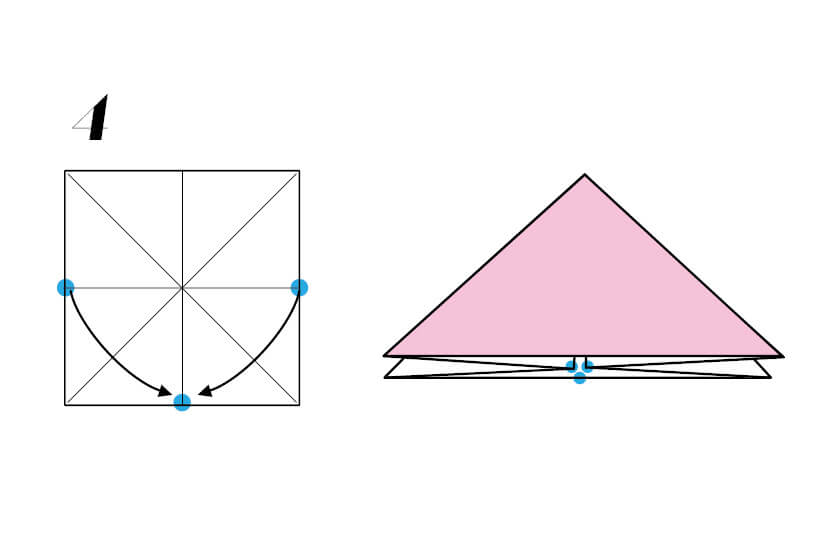
STEP 4: Bring the midpoint of the left and right edges, push them down to meet the midpoint of the bottom edge, then flatten the fold to create a triangle.
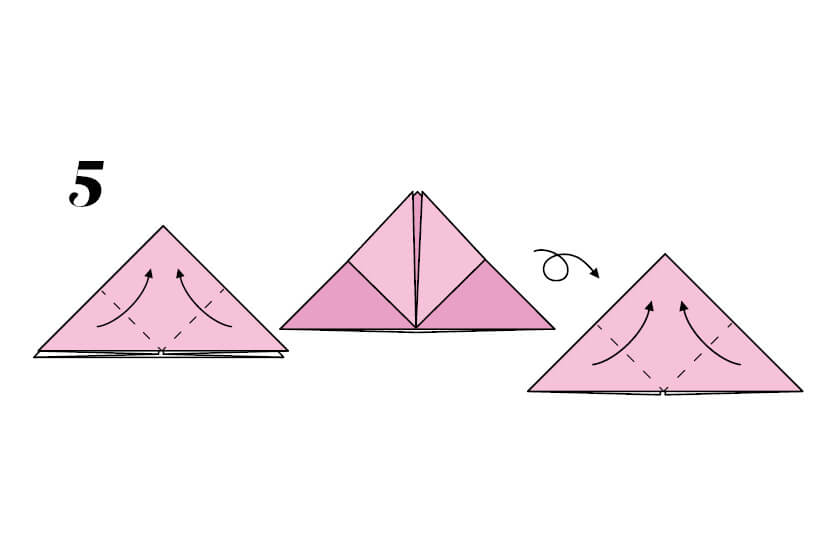
STEP 5: Fold up the left and right points of the top layer to meet the top point, turn paper over and repeat on the other side.
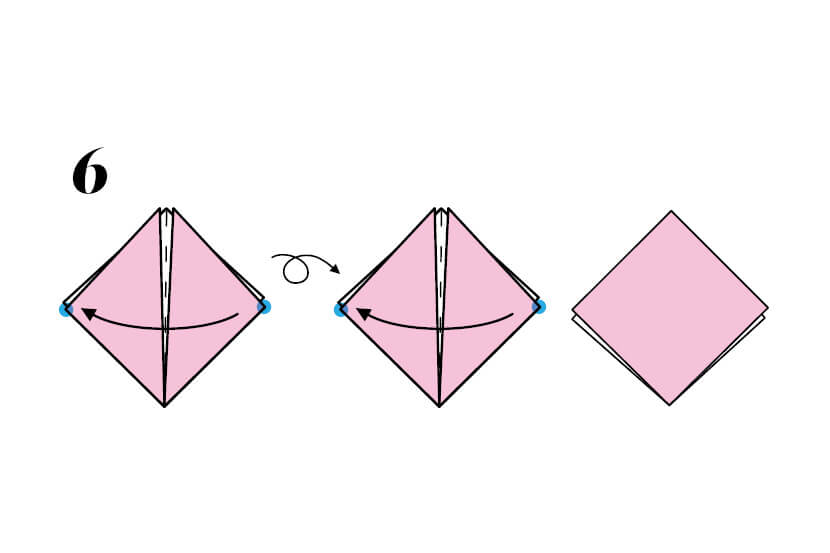
STEP 6: Fold the right-hand point over to meet the left-hand point, turn over and repeat on the opposite side.
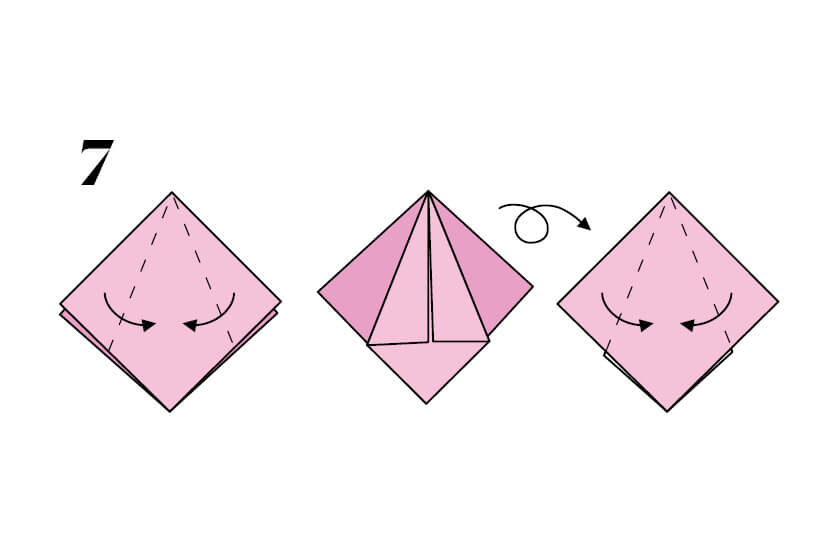
STEP 7: Fold the top left and right edges to align with the middle vertical crease, then flip over and repeat on the other side.
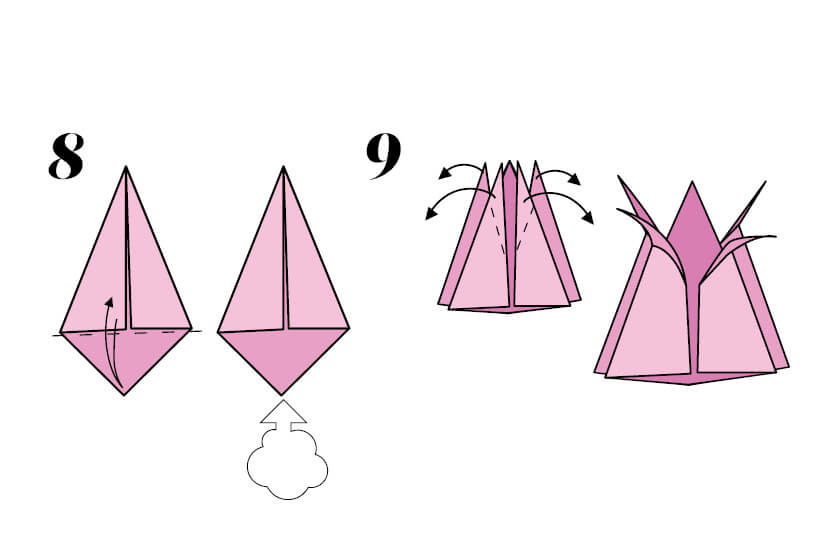
STEP 8: Fold the bottom point of the triangle up, crease well and unfold. Fold the point up on the other side and unfold. Push the point upwards to become a flat base, creating a pyramid shape.
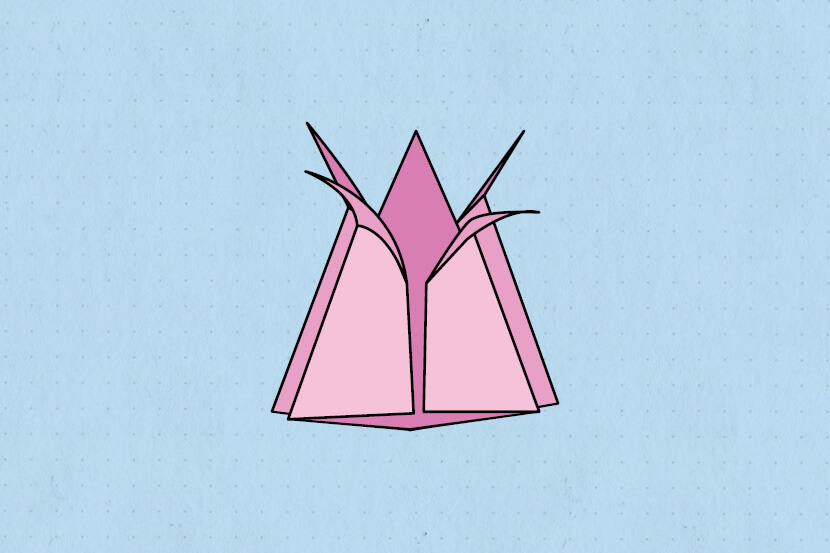
STEP 9: Peel back the 4 tips of the outer points at the top of the tulip to create the petals. Set aside for later.
Planter Pot
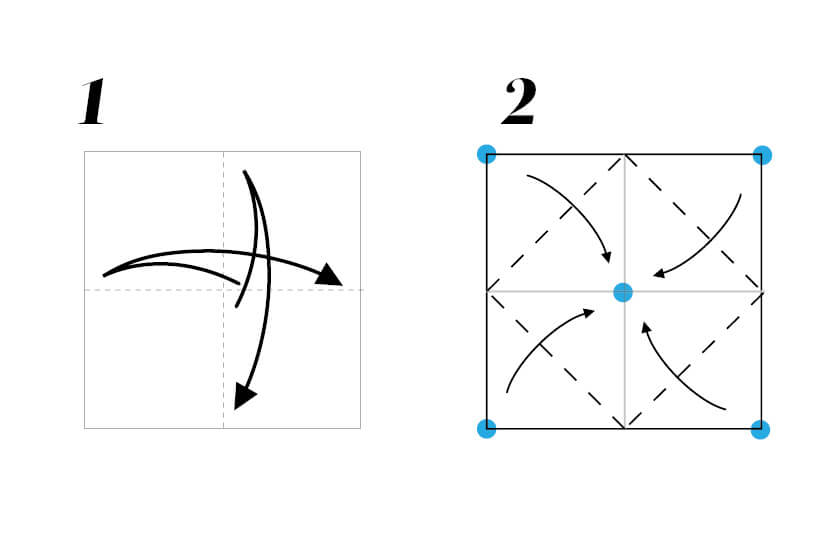
STEP 1: Take the dark orange square, wrong side facing up. Fold it in half vertically, crease well and unfold. Fold it in half horizontally, crease well and unfold.
STEP 2: Fold the four points in to meet the centre intersection point.
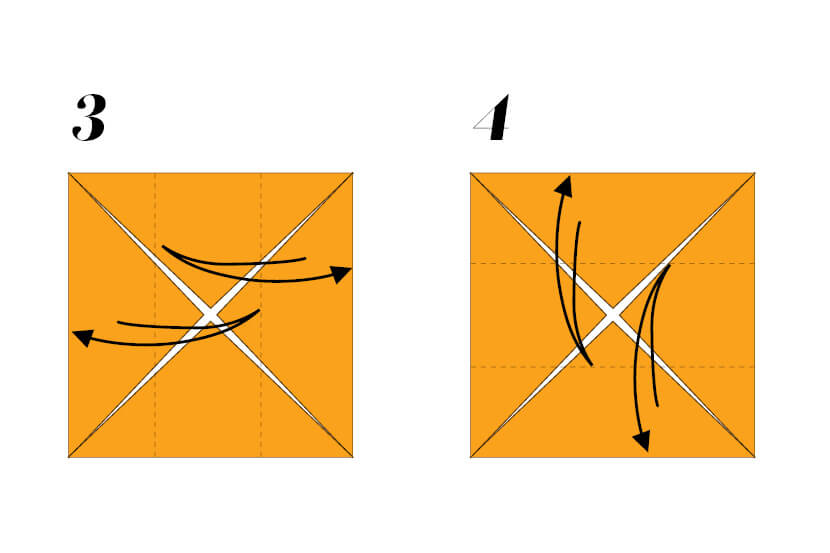
STEP 3: Fold the square into thirds vertically, crease well and unfold.
STEP 4: Fold the square into thirds horizontally, crease well and unfold.
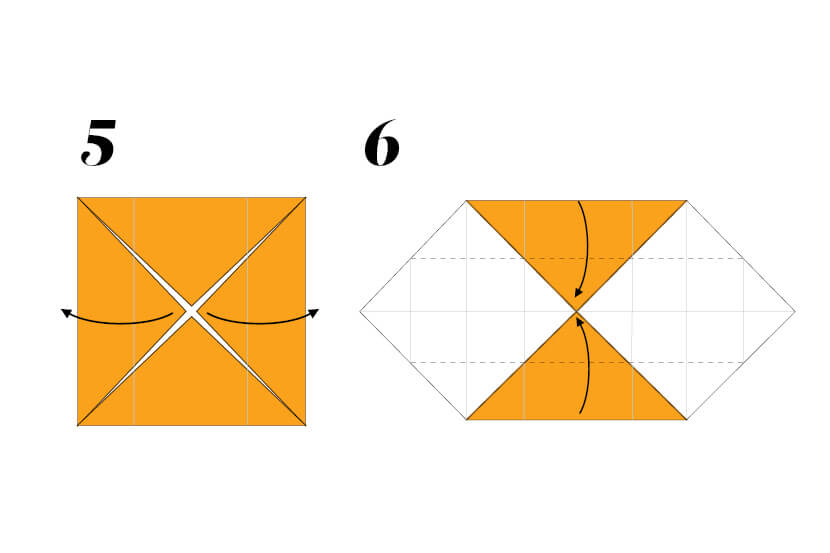
STEP 5: Open the left and right triangles.
STEP 6: Lift the top and bottom edges to stand up along the creases shown by the dotted lines.
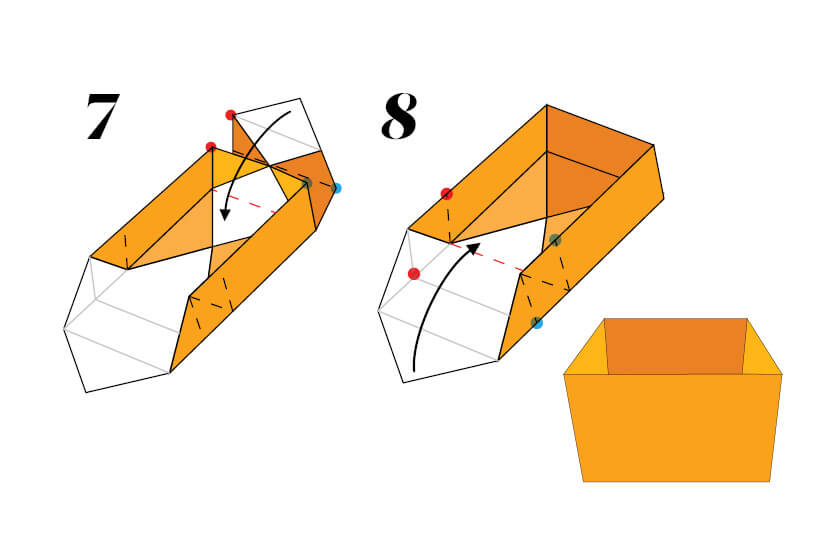
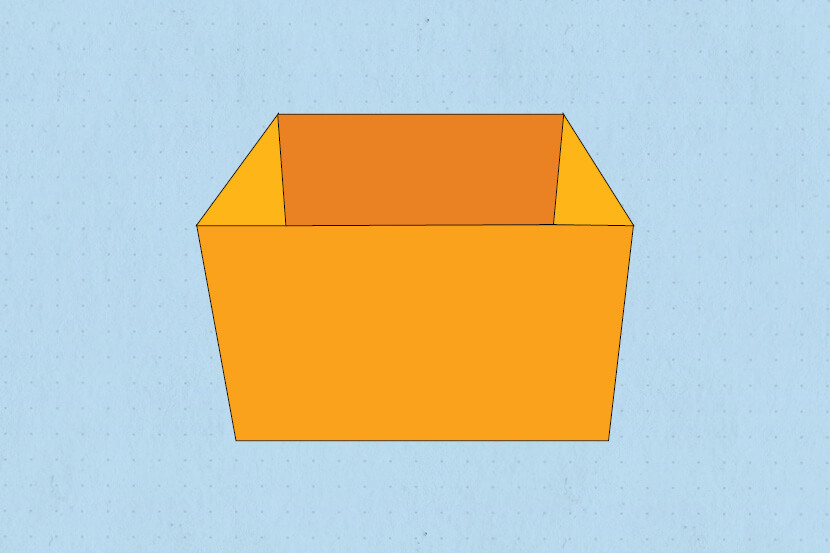
STEP 7: Stand the right side up and fold along the crease shown by the dotted red line. Bring the corners marked with blue dots together and the corners marked with red dots together. Fold over and bring the triangle down to sit on the base of the shape.
STEP 8: Repeat steps 6–8 to complete the other side of the pot.
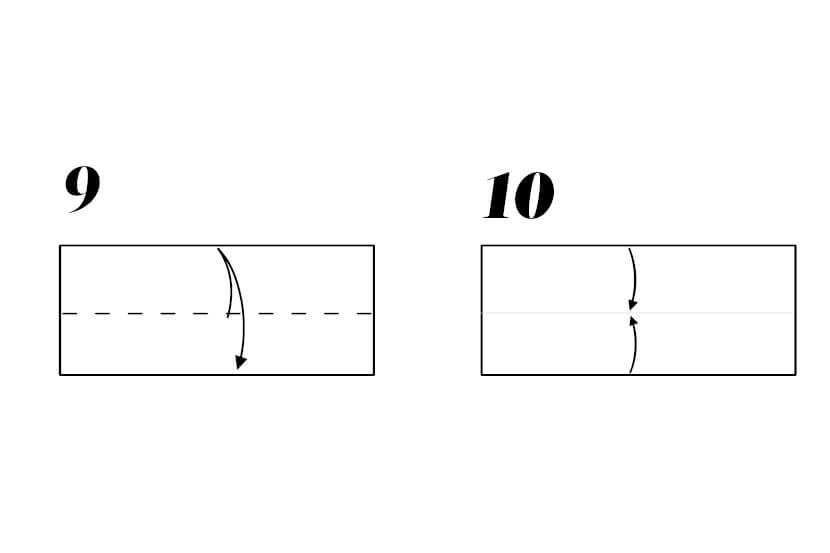
STEP 9: Now take the light orange strip, wrong side facing up. Fold it in half horizontally, crease well and unfold.
STEP 10: Fold the top and bottom edges in to meet the centre fold.
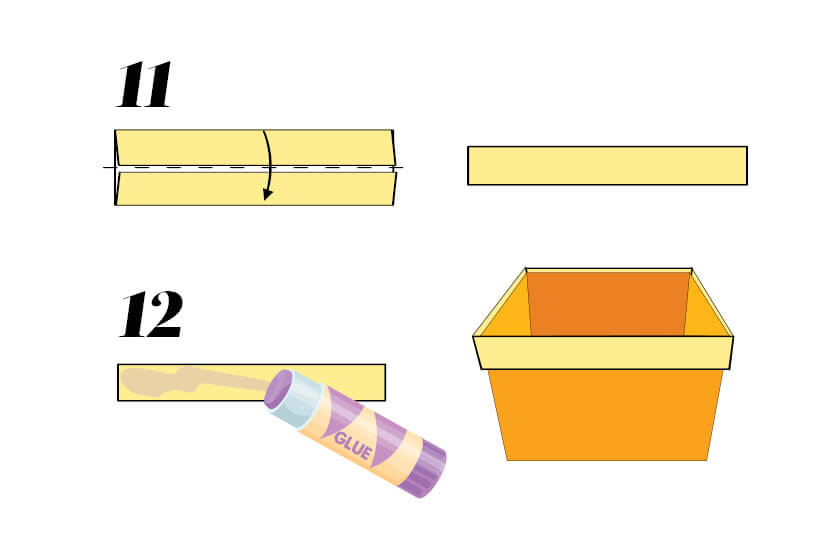
STEP 11: Fold in half along the centre fold.
STEP 12: Glue this strip along the top edge of your planter box.
Stem and Leaves
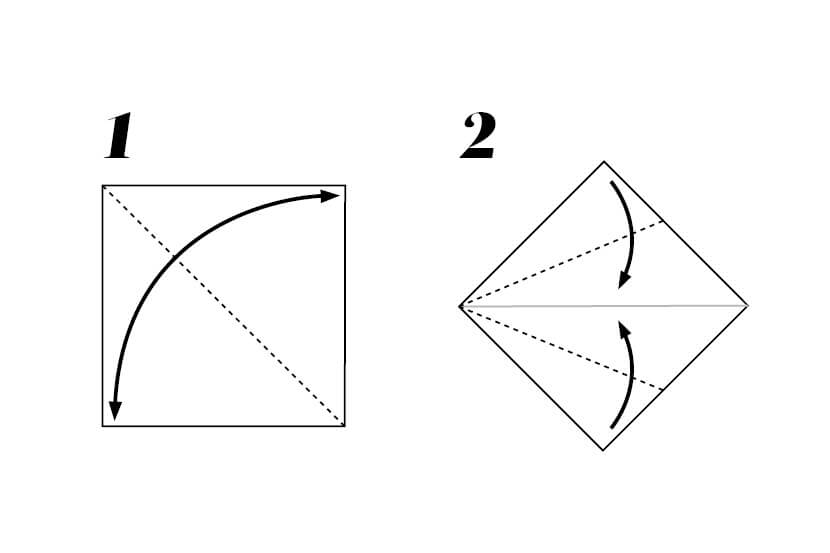
STEP 1: Take one of the green squares of paper, wrong side up. Fold it in half diagonally, crease well and unfold.
STEP 2: Rotate the paper so it is oriented as a diamond. Fold the top and bottom left edges to align with the horizontal crease.
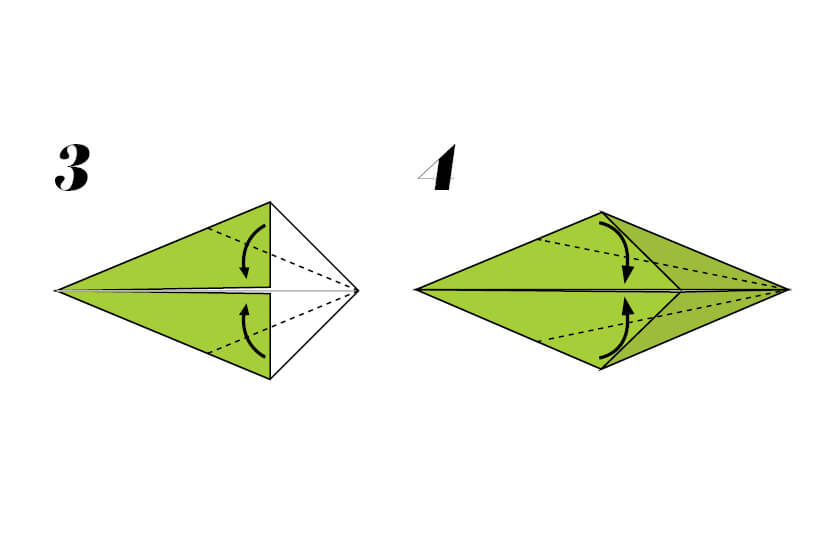
STEP 3: Fold the top and bottom right edges to align with the horizontal crease.
STEP 4: Repeat this fold again.
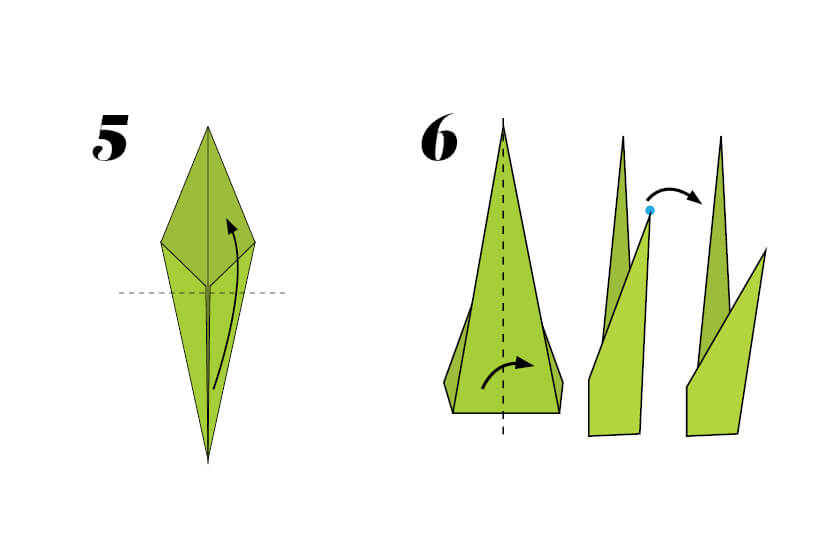
STEP 5: Rotate so the skinnier side is pointing towards you. Fold the bottom point upwards, along the dotted line indicated.
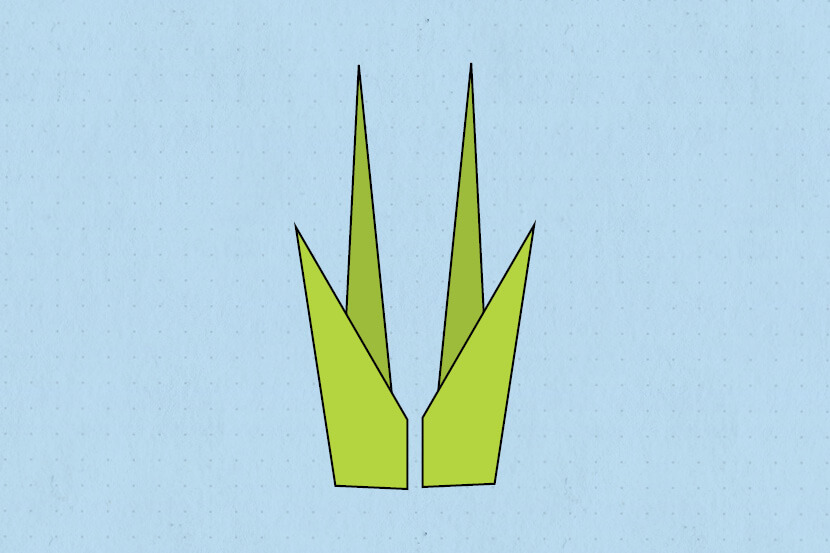
STEP 6: Now fold in half vertically. Hold the longer pointed tip (the stem) in one hand and gently pull the other point outwards and press to create a leaf.
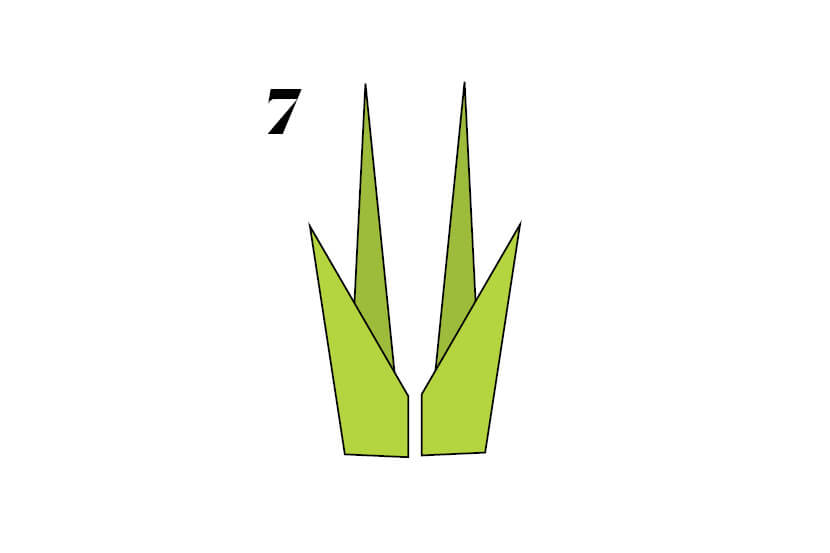
STEP 7: Repeat steps 1–6 on the other green square.
Assembly

STEP 1: Assemble the tulip by placing the two pointed ends of the stem into the hole in the bottom part of the tulip flower.
STEP 2: Place the assembled flower into the pot. You can cut strips out of the leftover paper from page 69 and crumple them into small balls to help prop up the flower and fill in the pot.


