
Add a spring to your step with this cheerful origami rabbit! All you need is a square piece of paper and a few folds to bring this cute bunny to life. Let’s get started!

1 Start with a square piece of paper. Fold in half horizontally, crease well, then unfold. Fold in half vertically, crease well, then unfold.
2 Fold the top and bottom edges inwards so they align with the middle horizontal crease. Press the folds firmly.
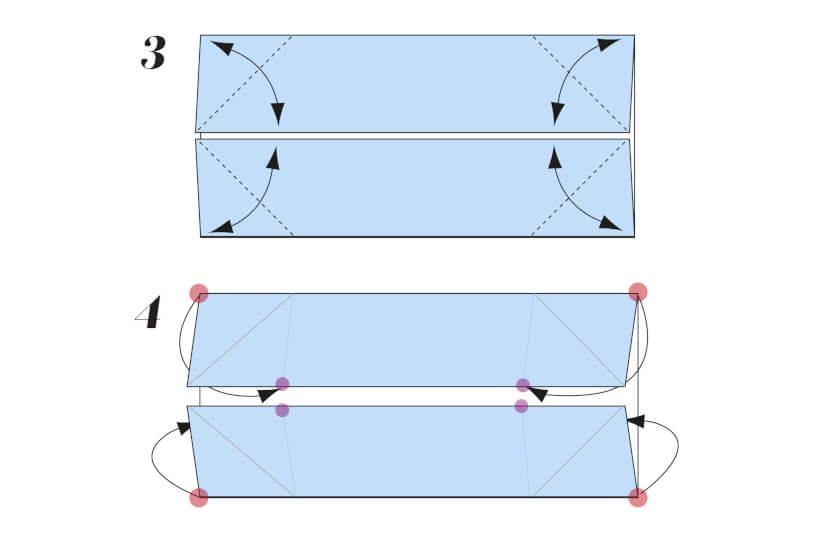
3 Fold all four corners diagonally inwards so the points meet the centre horizontal crease. Crease them well, then unfold.
4 Push the outer corners inwards along the creases to invert them, forming inward-pointing flaps. Crease neatly.
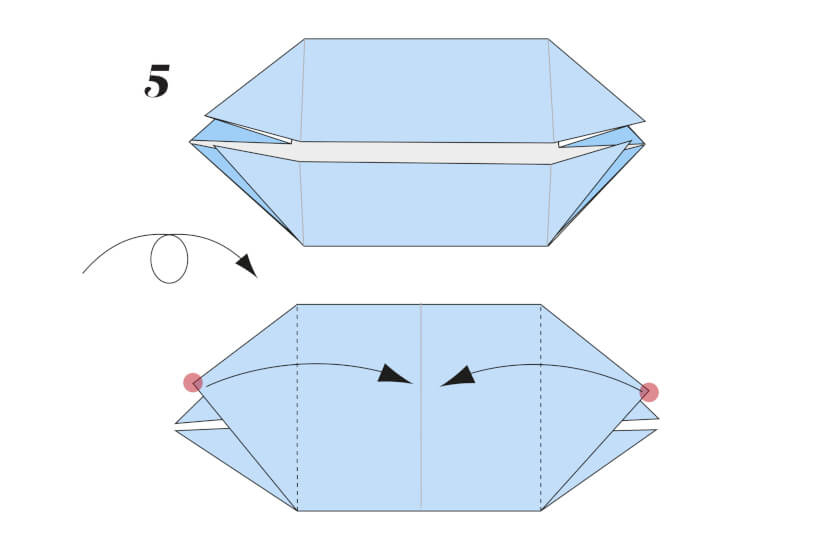
5 Turn the paper over. Fold the top layer’s left and right corners in so they meet at the centre vertical crease.

6 Turn the paper back over. Fold the top-left and bottom-left edges inwards to meet the middle horizontal crease.
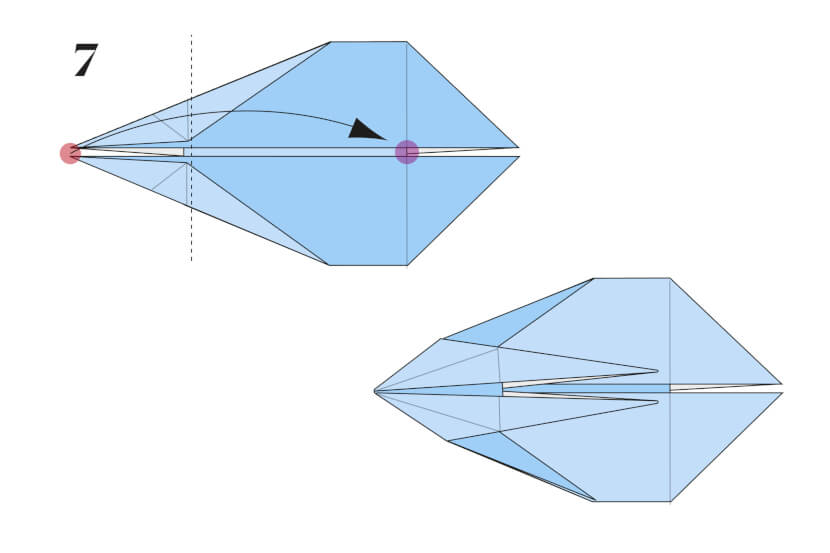
7 Fold the left corner along the dotted line so it meets the base of the triangle on the right-hand side.
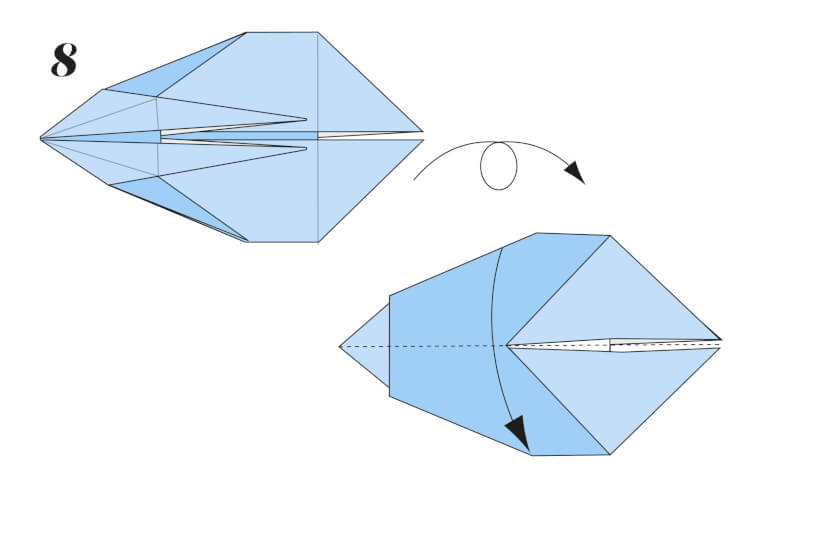
8 Turn the paper over and fold it in half vertically by bringing the top edge to meet the bottom edge.
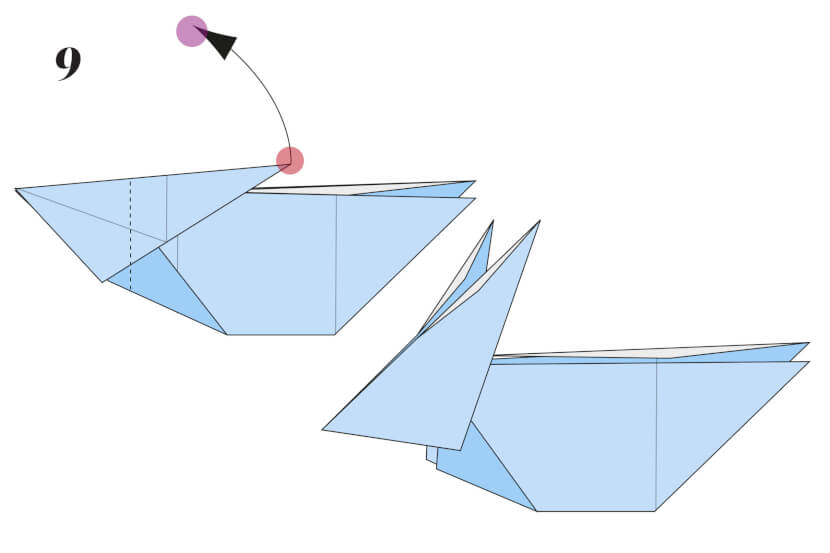
9 Gently lift the top two flaps in the middle and fold them over to the left side, flatten the fold.
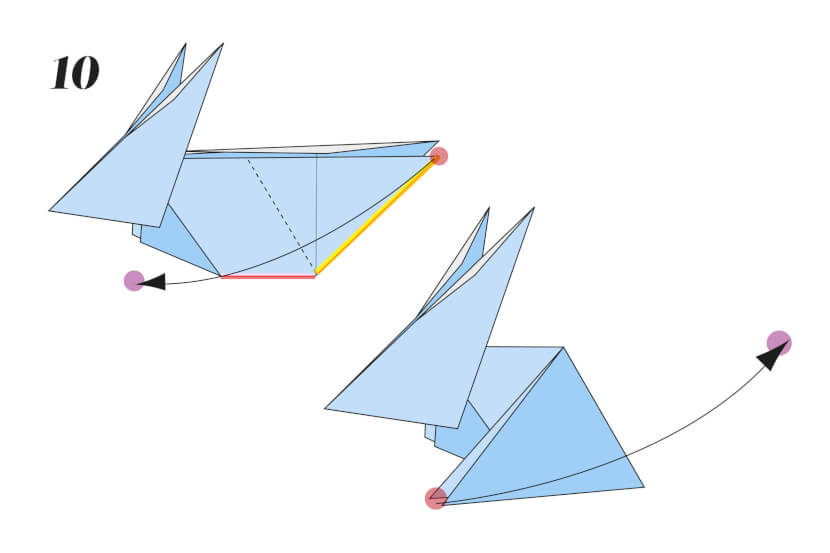
10 Fold both the top and bottom flaps of the right point forward along a diagonal (the dotted) line. Crease well, then unfold.
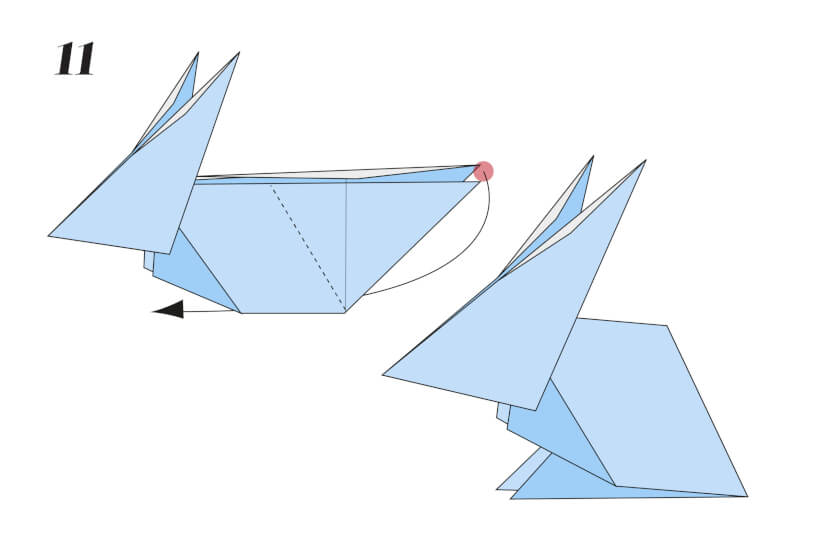
11 Using the crease you’ve just made, push the folds inwards to invert and form the back of the rabbit.
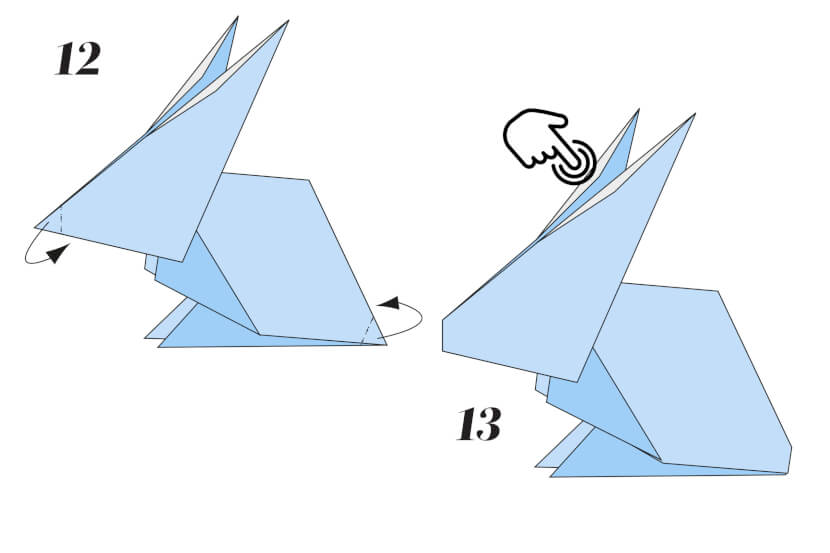
12 Fold the tip of the nose inwards and crease. Then fold both the upper and lower corner flaps inwards to shape the rear of the rabbit. Press firmly.
13 Gently open the two ear flaps (they’ll form small pockets). For a cuter look, fold each ear down diagonally to make them floppy.


