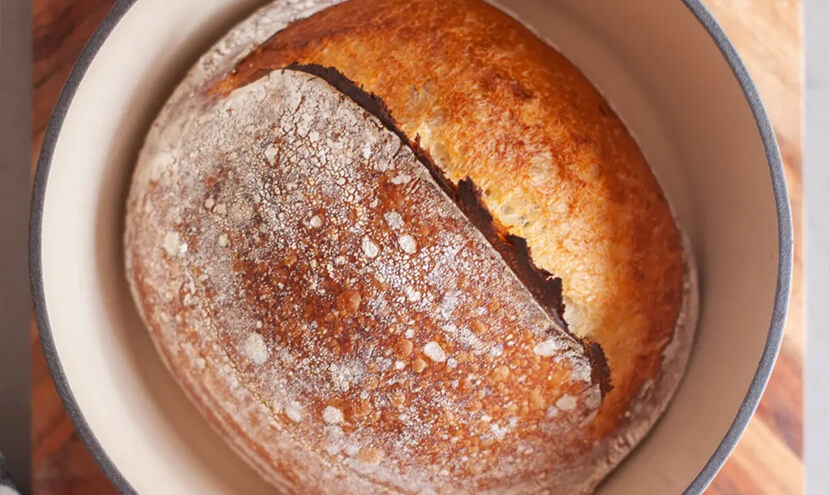
Dutch oven sourdough breadmaking is a brilliant option whether you’re a novice or experienced baker. Although the steps are lengthy and involve a number of rest periods, it actually requires less than an hour of active time – and the crusty finished product is well worth the wait!
Ingredients
Starter Feeding
- 40g sourdough starter (see tip)
- 40g white bread flour
- ½ cup water
Sourdough Loaf
- 350g white bakers flour
- 1 cup plus 2 tsp (280g) lukewarm water
- 70g active sourdough starter
- ½ tbsp salt
For Dusting
- ½ cup tapioca flour or corn starch
METHOD
STARTER FEEDING
These initial steps activate your starter, and need to be done 4-8 hours ahead of making the dough.
- In a clear container or jar, feed 40g of sourdough starter with half a cup of water and 40g of bread flour. Mix well with a fork until it forms a thick paste.
- Seal the jar and leave in a warm place (around 23-26ºC) until it has at least doubled in size. This usually takes 4-8 hours.
DOUGH
Once your starter is active, you’re ready to make the dough. It’s best to start in the morning so you have time for the required rest periods indicated in the steps.
- In a large mixing bowl, combine flour and water together to make the dough. Ensure there is no dry flour remaining.
- Add 70g active sourdough starter to the dough. Using a wet hand, smooth the starter over the top of the dough and then gently knead/massage for 2 minutes to combine.
- Cover the dough and rest for 30 minutes.
- Sprinkle salt evenly over the dough and gently dimple it into the dough your fingertips. Gently knead/massage the dough for 2 minutes to completely incorporate the salt.
- Cover the dough and rest for 30 minutes.
- Wet your hands to stop the dough sticking, then ‘coil fold’ the dough on both sides: this is done by running your hands around the edge of the bowl to loosen the dough from the sides, lifting it from the middle, then folding it back down into the bowl, tucking it under itself on both sides. Repeat this on the other side.
- Cover the dough and rest for 30 minutes.
- Repeat the coil fold and rest process another 2 times.
- After the third coil fold, cover the dough and rest for 90 minutes.
DOUGH SHAPING AND PROOFING
This is the final phase before baking, involving a rest period of 12-16 hours for the loaf to complete the fermentation process.
- Wet the inside of a medium-sized mixing bowl or banneton, and coat with tapioca flour or corn starch. If using a mixing bowl, lightly grease the bowl before flouring.
- Place the dough onto a clean bench, lightly dusted with bread flour.
- To shape the dough, using wet hands, gently pull the sides of the dough outwards to form a square. Get your hands well under the dough and pull from the centre outwards, so it is an even thickness. Repeat the stretching process until you have an even square of dough, roughly 40cm x 40cm, 1.5-2cm thick.
- Fold one side of the dough onto itself into the middle. Repeat on the other 3 sides in the shape of a square.
- Brush away any excess flour on the bench to one side.
- Flip the dough over, so the floured side is facing up. Gently pull the dough towards you, running it along the bench. You should feel some light resistance as you drag it towards yourself. Repeat a few times until the dough ball holds its shape.
- Sprinkle some tapioca flour or corn starch over the top of the dough, then place it floured-side down into your banneton or floured bowl. Dust the base with some tapioca flour or corn starch.
- Cover and place in the fridge to rest overnight for approximately 12-16 hours.
BAKING
After 12-16 hours of resting, you’re ready to bake!
- Pre-heat your Dutch oven at the oven’s highest temperature setting, fan forced, for 30 minutes.
- Remove your dough from the fridge. Dust the base of your dough again with tapioca flour or corn starch so it doesn’t stick.
- Carefully remove the Dutch oven from the oven using heatproof mitts, and take the lid off. As quickly as possible, gently tip the dough out of the banneton into the Dutch oven. With a sharp knife or razor blade, score the top of the dough from end-to-end, slightly off-centre. Aim for a 45 degree incision.
- Put the lid back on the Dutch oven, and return it to the oven. Bake for 20 minutes on the highest temperature, fan forced.
- After 20 minutes, remove the lid from your Dutch oven, reduce the temperature to 220ºC, and bake for a further 30 minutes.
- Remove the bread, place it onto a cooling rack, and allow to cool for 1.5 hours before slicing.
Top with your favourite spreads and enjoy! Bread will keep best in a tightly sealed plastic bag or bread bag for 2-3 days.
Recipe by Crumble Co.
TIP: Sourdough starters are available to buy if you’re unable to get some from a friend. Alternatively, there are some great DIY guides online, for example by Elly’s Everyday or Vegan Diaries. In all cases, if you look after your starter, it will keep you supplied for life!


